For home cooks and culinary enthusiasts, the KitchenAid stand mixer is often the centerpiece of the kitchen, a powerful ally for baking, mixing, and kneading. But its capabilities extend far beyond the bowl. With the right attachment, this versatile appliance can transform into a professional-grade tool, and none is more transformative than the KitchenAid meat grinder attachment. Imagine crafting gourmet burgers, custom sausages, or fresh-ground pet food right in your own kitchen – all with the power of your beloved stand mixer. This guide will delve into everything you need to know about this indispensable accessory, helping you unleash a new world of culinary possibilities.
Understanding Your KitchenAid Meat Grinder Attachment
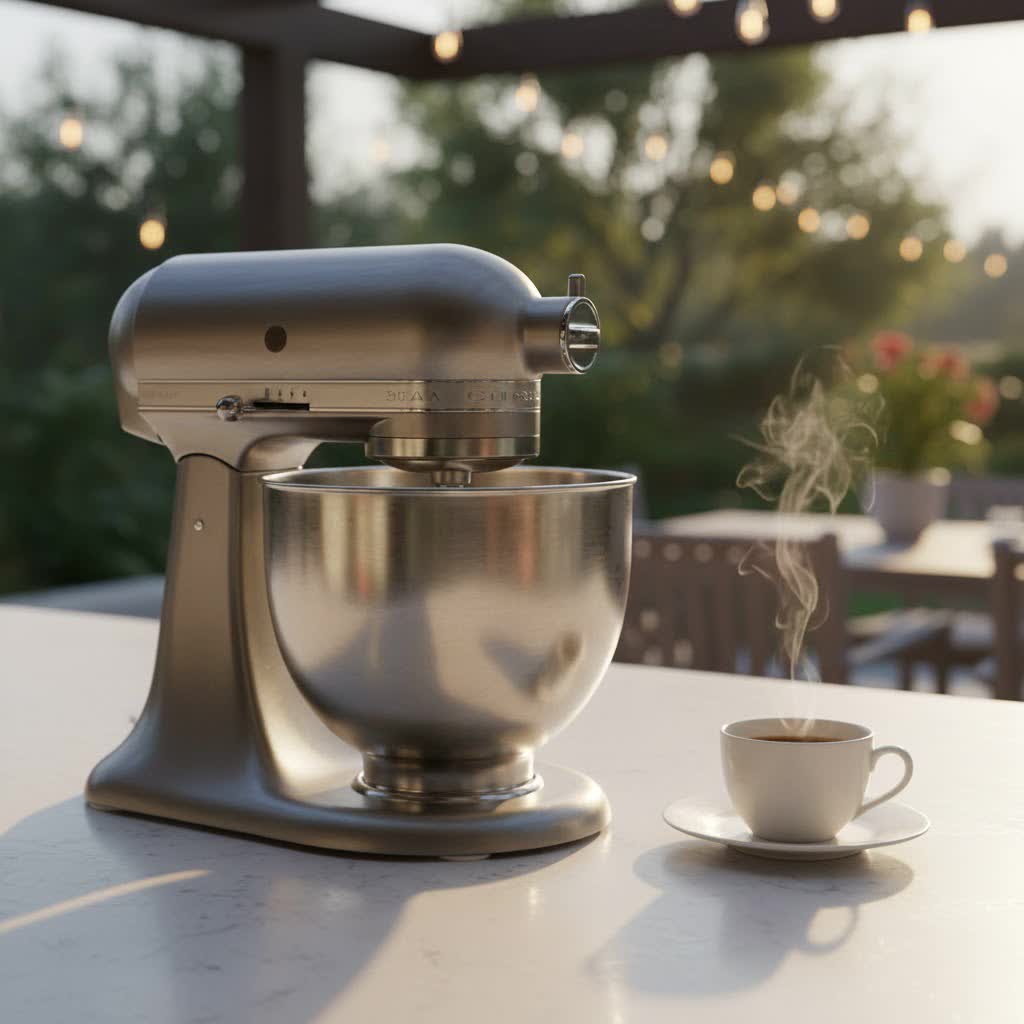
At its core, the KitchenAid meat grinder attachment is designed to utilize the power hub of any KitchenAid stand mixer, turning it into an efficient food processing unit. This ingenious accessory allows you to grind various ingredients with ease, making it a favorite among those who value freshness and control over their food. It effectively replaces the need for a bulky, dedicated meat grinder, saving valuable counter and storage space.
Over the years, KitchenAid has offered different versions of this attachment. Initially, many users encountered a plastic model (KSMFGA). While functional for light tasks, the introduction of the robust metal food grinder attachment (KSMMGA) marked a significant upgrade. This metal version quickly gained popularity for its enhanced durability, superior performance, and better thermal properties, which are crucial for effective meat grinding. It firmly established the stand mixer as a multi-functional culinary powerhouse, extending its utility well beyond traditional baking.
The Undeniable Benefits of Grinding Your Own
Bringing the art of meat grinding into your home kitchen with a KitchenAid attachment offers a host of compelling advantages that elevate your cooking and diet. From quality assurance to creative freedom, the benefits are substantial and immediately noticeable.
One of the most significant advantages is the uncompromised freshness and quality control you gain. When you grind your own meat, you choose the cuts, control the fat content, and ensure no undesirable fillers or preservatives are added. This means a superior taste and texture for your burgers, meatballs, and sausages, as well as peace of mind knowing exactly what you’re feeding your family. This level of transparency is simply unattainable with pre-packaged ground meats from the store.
Beyond quality, there are considerable cost savings and economic advantages. Buying whole cuts of meat is often more economical than purchasing pre-ground versions, especially for specialty meats. Over time, these savings accumulate, allowing the KitchenAid meat grinder attachment to pay for itself. It’s a smart investment for any budget-conscious home cook who doesn’t want to compromise on quality.
The attachment also unlocks immense culinary freedom, extending beyond just meat. While perfect for beef, chicken, pork, and even game, its versatility allows you to grind hard cheeses for fresh toppings, create homemade breadcrumbs from stale bread, or even process certain fruits and vegetables for sauces and purees. This opens up a world of experimental cooking, enabling you to craft unique flavor profiles and customized blends that cater precisely to your palate. From creating unique sausage blends to making your own healthy pet food, the possibilities are endless.
Finally, the convenience and space-saving design of the KitchenAid attachment are major draws. Instead of investing in and storing another large appliance, you simply attach it to your existing stand mixer. This compact solution is perfect for kitchens of all sizes, making it an ideal tool for everyday use without cluttering your countertops or cupboards. It’s an efficient way to expand your kitchen’s capabilities without expanding its footprint.
Choosing Your KitchenAid Meat Grinder: What to Look For
Selecting the right meat grinder attachment for your KitchenAid stand mixer involves understanding key features that impact performance, durability, and versatility. Not all attachments are created equal, and knowing what to prioritize will ensure you make the best choice for your culinary needs.
Material Matters: The Case for Metal (KSMMGA)
When it comes to meat grinders, the material of the attachment body is paramount. KitchenAid offers both plastic and metal versions, but the metal (KSMMGA) attachment is overwhelmingly recommended for several crucial reasons:
- Durability and Longevity: The robust metal construction is built to withstand rigorous use over time. Unlike plastic models, which can show wear, crack, or become less efficient with frequent grinding, the metal attachment is a long-term investment that handles tough cuts of meat with ease. Its sturdy build quality ensures it remains a reliable tool in your kitchen for years.
- Optimal Chilling for Superior Grinding: A key secret to perfectly ground meat is keeping ingredients and equipment very cold. Metal, unlike plastic, can be pre-chilled in the freezer or refrigerator, staying colder for longer during the grinding process. This prevents the meat from warming up, smearing, and becoming mushy, resulting in a cleaner, more precise, and superior texture.
- Ease of Cleaning and Maintenance: While care is always needed, the metal attachment is generally easier to clean effectively. Its non-porous surface resists odors and stains better than plastic. With proper hand washing and thorough drying, it maintains its pristine condition, though it’s important to remember that certain metal components like the blade and plates should always be hand-washed to prevent corrosion.
|
Our Picks for the Best Stand Mixer in 2026
As an Amazon Associate I earn from qualifying purchases.
|
||
| Num | Product | Action |
|---|---|---|
| 1 | VIVOHOME Stand Mixer, 660W 10 Speed 6 Quart Tilt-Head Kitchen Electric Food Mixer with Beater, Dough Hook, Wire Whip and Egg Separator, Pink |

|
| 2 | VIVOHOME Stand Mixer, 660W 10 Speed 6 Quart Tilt-Head Kitchen Electric Food Mixer with Beater, Dough Hook, Wire Whip and Egg Separator, Black |
|
| 3 | VIVOHOME Stand Mixer, 660W 10 Speed 6 Quart Tilt-Head Kitchen Electric Food Mixer with Beater, Dough Hook, Wire Whip and Egg Separator, Red |
|
| 4 | Stand Mixer, Zuccie 4.8QT Kitchen Electric Stand Mixer, 380W Motor Power Food Mixer, 8+P-Speed Dough Mixer with Dough Hook, Wire Whip & Beater, Silver |
|
| 5 | VIVOHOME Stand Mixer, 660W 10 Speed 6 Quart Tilt-Head Kitchen Electric Food Mixer with Beater, Dough Hook, Wire Whip and Egg Separator, Silver |
|
| 6 | Kitchen in the box Stand Mixer,3.2Qt Small Electric Food Mixer,6 Speeds Portable Lightweight Kitchen Mixer for Daily Use with Egg Whisk,Dough Hook,Flat Beater (Black) |
|
| 7 | Kitchen in the box Stand Mixer,3.2Qt Small Electric Food Mixer,6 Speeds Portable Lightweight Kitchen Mixer for Daily Use with Egg Whisk,Dough Hook,Flat Beater (Blue) |
|
| 8 | VIVOHOME Stand Mixer, 660W 10 Speed 6 Quart Tilt-Head Kitchen Electric Food Mixer with Beater, Dough Hook, Wire Whip and Egg Separator, Gray |
|
| 9 | VIVOHOME 3-in-1 Stand Mixer, 6 Quart Electric Tilt-Head Kitchen Mixer with Bowl, Multifunctional Food Mixer with Meat Grinder and Blender Attachments, Dough Hook, Beater, and Whisk, Red |
|
| 10 | VIVOHOME Stand Mixer, 660W 10 Speed 6 Quart Tilt-Head Kitchen Electric Food Mixer with Beater, Dough Hook, Wire Whip and Egg Separator, Blue |
|
Attachments and Grinding Plates: Customizing Your Grind
The versatility of your meat grinder attachment is significantly enhanced by the accessories it includes. The standard KitchenAid meat grinder typically comes with a range of plates and tubes to suit various culinary applications:
- Fine, Medium, and Coarse Plates: These interchangeable plates dictate the texture of your ground ingredients. A fine plate is ideal for smooth pâtés, baby food, or very finely ground meats for sausages. The medium plate is perfect for standard ground beef, meatballs, and most sausage recipes. A coarse plate is excellent for chili, stews, or creating a chunkier texture for certain sausages or dishes. Having all three allows for complete control over your recipe’s outcome.
- Sausage Stuffer Tubes: Many KitchenAid meat grinder attachments include sausage stuffer tubes, transforming your grinder into a sausage maker. These tubes allow you to easily fill casings with your freshly ground and seasoned meat, perfect for creating homemade bratwurst, breakfast links, or Italian sausages.
- Other Accessories: Look for attachments that include a durable food pusher to safely guide ingredients into the grinder, and a cleaning brush to help dislodge any stubborn food particles from the plates and components. A convenient storage case is also a bonus, keeping all parts organized and protected.
Compatibility with Your Stand Mixer
A major benefit of the KitchenAid meat grinder is its universal compatibility. The attachment is designed to connect seamlessly to the power hub of any household KitchenAid stand mixer, regardless of its model or age. This means you don’t need a specific mixer version; if you own a KitchenAid stand mixer, the attachment will work. Simply insert the attachment shaft into the front power hub and secure it with the mixer’s hub knob.
Value for Money: Is it Worth the Investment?
Compared to purchasing a dedicated, standalone meat grinder, the KitchenAid attachment often represents a more cost-effective and space-efficient investment for most home cooks. For those who occasionally grind meat or want to experiment with homemade sausages, it offers excellent value. While a specialized grinder might provide more power for very large batches, the KitchenAid attachment provides sufficient capability for typical home use, delivering fresh, high-quality results without the higher price tag or storage commitment of a separate appliance.
KitchenAid Meat Grinder vs. Dedicated Meat Grinders: A Comparison
Deciding between a KitchenAid stand mixer attachment and a standalone meat grinder often comes down to individual needs, frequency of use, and batch size. Both options offer the ability to grind meat, but they serve slightly different purposes in the home kitchen.
When the Attachment Shines: Versatility and Compactness
The KitchenAid meat grinder attachment excels in several areas, making it an ideal choice for many home cooks:
- Versatility: As a multi-functional accessory, it allows your existing KitchenAid stand mixer to perform grinding tasks in addition to its primary mixing functions. This means one appliance can do the work of many, maximizing your kitchen’s utility without adding more single-purpose gadgets. It’s not just for meat; it can also handle hard cheeses, bread, and certain vegetables.
- Compact Storage: For kitchens with limited counter or cabinet space, the attachment is a clear winner. It’s significantly smaller than a dedicated meat grinder, making it easy to store in a drawer or its own compact case when not in use. You avoid the clutter and bulk of another large appliance.
- Cost-Effectiveness: For those who already own a KitchenAid stand mixer, the attachment is a more budget-friendly option than purchasing a separate, specialized meat grinder. It leverages an investment you’ve already made, providing added functionality at a lower incremental cost.
- Ideal for Occasional Use: If you plan to grind meat for family meals, small batches of sausage, or occasional burger nights, the KitchenAid attachment offers ample power and performance. It’s perfect for home cooks who appreciate fresh ingredients but don’t need to process huge quantities regularly.
When a Dedicated Grinder is Preferred: Power and Volume
While the KitchenAid attachment is highly capable, a dedicated meat grinder might be a better fit for specific scenarios:
- Higher Power and Capacity: Standalone meat grinders typically feature more powerful motors and larger hoppers, designed to handle tougher cuts of meat and process much larger volumes more quickly. If you frequently grind large quantities—like an entire deer after hunting season, or significant batches for catering—a dedicated unit will be more efficient and less taxing on the motor.
- Continuous Operation: Dedicated grinders are built for sustained use, often without needing breaks for the motor to cool down. The KitchenAid stand mixer, while robust, is primarily designed for intermittent use across various tasks. For continuous, heavy-duty grinding, a specialized machine is engineered for the task.
- Specialized Features: Some dedicated grinders come with unique features like reverse functions to clear jams, multiple speed settings, or specialized grinding components that go beyond what a stand mixer attachment offers. These can be crucial for professional or very high-volume users.
In summary, the KitchenAid meat grinder attachment is an excellent, versatile, and space-saving solution for most home cooks. However, if your needs involve frequent, large-volume, or heavy-duty grinding, a dedicated meat grinder might be the more appropriate investment.
Mastering Your KitchenAid Meat Grinder: Usage Tips
Using your KitchenAid meat grinder attachment effectively ensures the best results and prolongs the life of your equipment. A few simple techniques can make a significant difference in the quality of your ground meat and the ease of the process.
Preparation is Key: Chilling Meat and Equipment
The golden rule for superior meat grinding is temperature control. Begin by cutting your meat into small, manageable cubes or strips that will fit comfortably into the grinder’s feed tube. Crucially, ensure the meat is very cold, ideally partially frozen for about 20-30 minutes until it’s firm but not rock-solid. This firm texture allows for a clean cut, preventing the meat from smearing and creating a much better consistency. For optimal results, go a step further and pre-chill your grinder attachment itself—the housing, auger, blade, and grinding plates—in the freezer for at least 30 minutes before assembly. A cold grinder keeps the meat cold, which is paramount for a clean grind.
Assembling the Attachment: Step-by-Step
Before you begin, always ensure your KitchenAid stand mixer is turned off and unplugged.
- Attach the Grinder: Insert the attachment shaft into the power hub at the front of your stand mixer. Twist it slightly to ensure it’s securely seated, then tighten the mixer’s hub knob clockwise until the attachment is firmly in place.
- Insert the Auger: Slide the long, helical auger (worm) into the grinder body.
- Place the Blade: Position the grinding knife (blade) onto the square shaft of the auger. Ensure the sharp edges of the blade face outwards, towards the grinding plate.
- Select Grinding Plate: Choose your desired grinding plate—fine, medium, or coarse—and place it over the blade and auger shaft.
- Secure the Ring: Screw on the securing ring (collar) clockwise until it is hand-tight. Do not overtighten, as this can strain the mixer.
Grinding Techniques: Speed, Batches, and Double Grinding
Once assembled and chilled, you’re ready to grind. Load your prepared, chilled meat into the food tray. Turn your stand mixer to a medium-high speed, typically speed 4 or 6 for most models. Use the food pusher to gently guide the meat into the feed tube. Never use your fingers or any other utensil to push meat into the grinder, as this can be extremely dangerous.
It’s best to grind in small batches to avoid overloading the motor and ensure consistent results. If you desire an even finer texture, you can run the meat through the grinder a second time using a finer plate. For best results, chill the meat again between the first and second grind.
Beyond Meat: Grinding Cheese, Breadcrumbs, and Vegetables
The KitchenAid meat grinder isn’t limited to just meat. It excels at other tasks too:
- Grinding Hard Cheeses: Firm cheeses like Parmesan or aged cheddar can be easily ground for fresh toppings. Ensure the cheese is cold and cut into small pieces.
- Making Fresh Breadcrumbs: Day-old bread, slightly dried, can be transformed into fresh breadcrumbs using the coarse or medium plate.
- Processing Vegetables: While not ideal for very soft or watery vegetables, harder vegetables like carrots, onions (for small amounts), or firm peppers can be ground for relishes, salsas, or to incorporate into meat mixtures. Always use the coarse plate for vegetables.
Care and Maintenance for Longevity
Proper care and maintenance are crucial for extending the life of your KitchenAid meat grinder attachment and ensuring it remains hygienic. Neglecting these steps can lead to rusting, dull blades, or bacterial growth.
Immediate Disassembly and Cleaning
The most important rule for cleaning your meat grinder is to disassemble and clean it immediately after use. Do not let meat particles dry and harden on the components, as this makes cleaning much more difficult and can harbor bacteria.
- Disassemble: Turn off and unplug your stand mixer. Carefully remove the grinder attachment. Then, unscrew the securing ring, remove the grinding plate, the blade, and the auger from the housing.
- Initial Rinse: Rinse all components under warm running water to remove any loose meat residue. For stubborn bits, the included cleaning brush is invaluable.
Hand Washing vs. Dishwasher Safety
KitchenAid typically advises hand washing for most components of the metal meat grinder attachment. While the main housing might be dishwasher safe on some models (always check your specific manual), the crucial metal parts—the grinding knife (blade) and grinding plates—should always be hand-washed with warm, soapy water. Dishwasher detergents can be abrasive and cause discoloration or corrosion on these specialized metal parts, dulling the blade and compromising the plates. Use a mild dish soap and a sponge or soft brush.
Proper Drying and Storage to Prevent Rust
After washing, thoroughly dry every component immediately. Metal parts, especially those made of aluminum (which is common for grinder bodies), are prone to oxidation and rusting if left wet. Use a clean cloth to dry all surfaces, then allow them to air dry completely on a rack before storing. Once completely dry, store the attachment and its accessories in its original storage case or a dry, enclosed space to protect it from dust and moisture. This meticulous drying process is key to preventing rust and maintaining the attachment’s pristine condition.
Troubleshooting Common Issues
While the KitchenAid meat grinder is generally reliable, you might encounter minor issues:
- Meat Smearing/Mushy Texture: This is almost always due to the meat or grinder not being cold enough. Ensure both are thoroughly chilled, ideally partially frozen, before grinding.
- Grinder Clogging: This can happen if meat pieces are too large, not cut properly, or if the grinder is overloaded. Cut meat into smaller, uniform pieces and feed them slowly. If it clogs, turn off the mixer, disassemble, clear the clog, clean, and resume.
- Attachment Loosening: Ensure the mixer’s hub knob is securely tightened before starting.
- Rusting: Prevent this by always hand-washing metal parts (especially blades/plates) and drying them completely after each use.
Where to Purchase Your KitchenAid Meat Grinder Attachment
Acquiring a KitchenAid meat grinder attachment is relatively straightforward, with several reliable options available to consumers. Knowing where to look and what to consider can help ensure a smooth purchase and access to good customer support.
You can typically purchase the KitchenAid meat grinder attachment from authorized KitchenAid retailers and major appliance stores. These often include large department stores, kitchen specialty shops, and electronics retailers. Purchasing from these brick-and-mortar stores allows you to see the product in person, ask questions, and potentially receive immediate customer service.
Online stores and e-commerce platforms are also popular avenues. The official KitchenAid website, Amazon, Best Buy, and other major online retailers frequently carry the attachment. Buying online offers convenience, often competitive pricing, and a wider selection, including different versions (like the plastic vs. metal model).
When buying online, it’s wise to consider a few things:
- Verify the Model: Double-check that you are purchasing the metal food grinder attachment (KSMMGA) if that is your preference, as it is generally considered the superior model for durability and performance compared to older plastic versions.
- Read Reviews: Look at recent customer reviews to gauge satisfaction and identify any common issues or praises.
- Check Return Policies and Warranties: Ensure the retailer has a clear return policy and that the product comes with the standard KitchenAid warranty. This provides peace of mind in case of defects or if the product doesn’t meet your expectations.
KitchenAid products typically come with a manufacturer’s warranty, which covers defects in materials and workmanship. Should you encounter any issues, reaching out to KitchenAid customer support or the retailer where you purchased the attachment is advisable. They can provide troubleshooting assistance, guide you through warranty claims, or offer replacement parts if needed.
Your Essential Buying Guide
Investing in a KitchenAid meat grinder attachment is a decision that can significantly enhance your culinary capabilities. To ensure you select the perfect model for your kitchen, consider these crucial factors and questions before making your purchase.
Key Questions Before You Buy
Before you commit, ask yourself these questions to clarify your needs:
- How often will I use it? For occasional grinding (once a month or less), the KitchenAid attachment is ideal. For very frequent or large-volume grinding, you might consider a dedicated unit.
- What will I primarily grind? If it’s mostly meat, the metal attachment is a must. If you also plan to grind hard cheeses, bread, or certain vegetables, ensure the model you choose is versatile enough.
- Do I prioritize durability and performance? If yes, the metal (KSMMGA) attachment is the clear choice over its plastic predecessor.
- What accessories do I need? Do you want multiple grinding plates, sausage stuffer tubes, or a cleaning brush? Ensure the package includes what you require, or budget for additional accessories.
- What is my budget? While generally more affordable than standalone grinders, prices can vary, especially between the plastic and metal versions.
Matching Your Needs to the Right Model
Based on your answers to the above questions, you can match your needs to the appropriate KitchenAid meat grinder attachment:
- For the average home cook: The KitchenAid Metal Food Grinder Attachment (KSMMGA) is highly recommended. It offers excellent durability, superior grinding performance due to better chilling properties, and comes with a versatile set of grinding plates and sausage stuffer tubes, making it suitable for a wide range of tasks.
- For budget-conscious buyers or very light use: An older plastic food grinder attachment (KSMFGA) might be an option, but be aware of its limitations in durability and performance, especially with tougher meats.
- For advanced users or those with specific needs: Consider whether you need specialized accessories beyond what the standard attachment offers, such as a fruit and vegetable strainer (sold separately).
Budgeting for Quality
While the KitchenAid attachment is an investment, it typically offers excellent value for money. Remember that a higher initial cost for the metal version often translates to greater longevity and performance, saving you money in the long run by avoiding replacements and delivering superior results. Factor in any potential costs for additional accessories you might desire. Always look for reputable retailers and check for warranty information to protect your investment.
By carefully considering these points, you can confidently choose a KitchenAid meat grinder attachment that will serve your kitchen well, opening up exciting new avenues for fresh, homemade culinary creations.
Conclusion
The Kitchenaid Stand Mixer Meat Grinder attachment is more than just an accessory; it’s a gateway to a world of fresh, homemade ingredients and culinary creativity. By transforming your beloved stand mixer into a powerful food grinder, it empowers you to take control of your food’s quality, save money, and explore a vast array of recipes from gourmet burgers to custom sausages. Opting for the durable metal version ensures optimal performance and longevity, allowing you to grind meat, cheese, and even breadcrumbs with consistent, professional results.
Mastering its use, from chilling your ingredients to meticulous cleaning, will guarantee years of reliable service and delicious outcomes. This versatile tool not only declutters your kitchen by eliminating the need for a separate appliance but also enhances your cooking with unparalleled freshness and flavor. Ready to elevate your home cooking and truly understand what goes into your meals?
Frequently Asked Questions
Can I grind chicken bones with my KitchenAid meat grinder?
No, the KitchenAid meat grinder attachment is not designed to grind bones, especially hard ones like chicken bones. Doing so can severely damage the attachment’s components, including the blade and auger, and may void your warranty. It is intended for grinding boneless meats, hard cheeses, and certain vegetables.
Is the KitchenAid meat grinder attachment dishwasher safe?
For the metal meat grinder attachment (KSMMGA), the main housing is often top-rack dishwasher safe, but you should always check your specific model’s manual. However, the metal grinding knife (blade) and grinding plates should always be hand-washed with warm, soapy water and thoroughly dried immediately to prevent rust and maintain sharpness.
What speed should I use for grinding meat?
For optimal performance and to prevent motor strain, it is generally recommended to use a medium-high speed setting, typically speed 4 or 6, on your KitchenAid stand mixer when grinding meat. This provides sufficient power for a clean and efficient grind without overheating the motor.
Can I grind vegetables in my KitchenAid meat grinder?
Yes, you can grind certain vegetables in your KitchenAid meat grinder attachment, especially firmer ones like carrots, onions (in small amounts), or bell peppers. It’s best to use the coarse grinding plate for vegetables. Avoid very watery or fibrous vegetables, as they might not grind well and could potentially clog the attachment.
How do I prevent the meat from smearing?
To prevent meat from smearing and achieve a clean, distinct grind, it is crucial to ensure both your meat and the grinder attachment are very cold. Partially freezing the meat for 20-30 minutes until it’s firm, and chilling the grinder components in the freezer beforehand, will help keep the meat firm during grinding, resulting in a superior texture.